Aligned Yoga 300hr Online Training Experience
My experience so far with Briohny Smyth’s Aligned Yoga Online Teacher Training Course. Spoiler Alert: I am loving it!
About a month ago, I started an online yoga teacher training course with Briohny Smyth called Aligned Yoga. I was originally supposed to do this training in Thailand in July 2020, but due to Covid-19, it was cancelled. I spoke to Bri after she made the important and responsible decision to cancel the training and she asked what my thoughts were on taking it online instead. To be honest, I was REALLY disappointed to not be able to do a training in person. I felt like I wouldn't get as much out of the course because it was online. But this was the only option that was available to take this training with her in our current world state. The 200hr immersive in-person training I did back in 2016-17 gave me the ability to really tune into what I was learning and I wasn’t sure how I would do with an online training while working in the city.
It took me a while to even start the training because I felt I needed to get into the right mindset where I could live what I was learning. Well… after waiting longer than I anticipated, over the holiday season I finally had some extra time and energy to start the course. I have to say, I was IMMEDIATELY blown away by the information that I was receiving. I have been sharing and creating yoga pose alignment tutorials for the last 4 years and I am always searching for the best, most accurate content to share with other yogis. The amount of information I learned in just one week of Bri’s training has filled in a lot of missing pieces to my years of learning from how-tos and tutorials on Instagram and through other websites. I was pleasantly surprised and wished I had started sooner!
Part of the reason why I chose to do Briohny Smyth’s training was because of her ability to explain concepts with easy in her Instagram tutorials. She is always so clear and concise- and her alignment is always PERFECT. I also felt as though she was really down to earth and I liked the vibe she gave off on her Instagram account. She was not showy, she did not wear a ton of makeup, and she never contorted herself into poses that just looked painful. Her kindness spoke through all of her posts and stories. She was the person I knew I needed to learn from. After speaking with her about the training, I got to know how authentic she actually is and how much she truly cares about all of her followers individually (she has a lot) rather than thinking of them as just numbers.
So back to the training….
This training has been like a book I couldn’t put down. It started with learning how to properly engage the body in different, foundational areas. Then it went into detail on how to apply these body engagements into all of the foundational poses. I thought I knew all about foundational poses and that this would just be a review for me. Instead, I found that with every lesson, I learned at least one new tidbit of information that I could immediately implement into my teachings. The information that was presented was so simply, yet so clear and concise. And so easy to understand and apply. This is another reason why I chose Bri. Every day of the course, you learn also learn about pranayama, kriya or philosophy.
Now, would it be better if I learned this information in Thailand? Yes and No.
YOGA CLASSES:
I really love my self-practice but I think it is really important to also be a student taking classes to continue to grow. In-person classes are so amazing because of the energy and sense of community with the instructor and fellow teacher trainees. But online classes were the next best thing, and I love that I can do her classes when it is suitable for me. During an in-person training, sometimes you need to really dig deep and maybe even force yourself to do the 2 classes that were offered in a day. If you aren’t able to partake in classes during an immersive training, you would not be able to retake those classes in the future. So when I didn’t feel up to it, I ended up missing out. Having online classes gives me the ability and flexibility to do the classes at my own pace. However, I would have also loved to get the physical adjustments and experience the feeling of practicing as a group.
LECTURES:
I actually much preferred online. I found in previous trainings that there is only a certain amount of time to convey all the information that needed to be conveyed. So, if the teacher got off topic because of questions, there would end up being information that was missed or skimmed over. During lectures in person, I found myself frantically taking notes and listening as intently as I could all at once. For online: I can stop, pause the video and even go back a minute or two if there was something I missed or wanted to watch again. This has been the best thing about this training. I really feel that all of the information is conveyed to its fullest extent and that I can take proper notes at my own pace. People can still ask questions and those are also answered by Bri, but it is separate from the actual lecture. This is my favourite part of the training by far!
I liked having the option to print the manual. I chose to print most of it but there are A LOT of pages. I knew that I would be taking rigorous notes so printing the main pages was absolutely necessary.
COMMUNITY:
There are also live sessions (I missed some of them due to my schedule for work), where we can ask questions and even practice all together virtually. This has made me feel like a part of a community, and feel like I am being seen. It is nice to see everyone’s faces and hear other voices from attendees in the training. Bri has also encouraged us to get to know each other over Instagram and social media. I do miss the community feel and getting to know individuals in person, but I know I can still connect with these teacher trainees in other ways. There is also a Facebook group where you can ask questions, connect and share with others in the group.
TO SUM UP:
For me, the information I am receiving from this training is SO VALUEABLE and the most important reason for why I decided to take this training. I never thought I would enjoy an online teacher training, but I do, I REALLY do.
Bri stayed true to the person she portrays herself to be on Instagram throughout the training and continuous to blow my mind with her positive attitude, kindness and clear communication. Mathieu is the co-teacher who focuses on teaching pranayama, kirtan, kriya, yoga philosophy, etc. Its nice to have another voice to listen to and another perspective to learn from. Regardless, I could listen to Bri all day- her voice is very soothing and easy to listen to.
So would I recommend this Online Yoga Teacher Training?
The short answer is: YES!! Absolutely!
If you are wanting to become a teacher trainer, but can't afford or attend an in-person training, I would highly recommend this online training. You have a year from the date of purchase to complete it and you have access to the entire course throughout that year. I would recommend taking diligent notes, and paying as much attention as you can, asking questions whenever you can, and connecting with others in the training.
I also think it is important to eventually take an in person training of some sort in the future. You could do the 200HR online and then your 300HR in person somewhere you’d like to travel to (or with Briohny, once the world re-opens again). Or if you already have your 200HR, this 300HR training is an excellent way for you to improve your own practice and teaching. And for the price, you can't beat it! There is so much information and golden nuggets of info that are SO worth it. I will continue to enjoy my time with this course as I learn am learning SO much more than I thought I would. I am so grateful to Bri for making this training accessible online and really glad I went this route. Its been an amazing experience so far and I'm only a few weeks into the actual course. Looking forward to posting more about my experience with this training.
Here is the link if you are interested:
www.alignedyoga.com
Her instagram is Yoga With Briohny
xx
Yoga Alignment
How To Use Yoga Blocks
3 ways to incorporate yoga blocks into your practice today!
Here are 3 different ways to use yoga blocks. There are so many different ways you can use blocks in your practice. They are incredibly useful in helping to build a strong foundation, and developing proper body alignment and healthy movement patterns.
1. #Warrior3Pose or #Virabhadrasana3 either starting from a standing forward fold position and lifting the leg up or lowering down with the blocks in your hands for support. This is a great way to help you balanced so you can focus on perfecting your alignment. You can use a block for many standing balancing poses.
2. #EasyPose or #Sukhasana
This is a game changer for a lot of my students. Whether you are meditating, centering or moving through the upper body, using a block will help you lift the hips up and support the low back. This will help relieve tension in the hips and allow you to sit up taller with more ease. It helps keep the back from rounding and brings it to a neutral position. You can use a block to help lift any part of your body off the mat.
3. #HalfSplitsPose or #ArdhaHanumanasana
With less flexible yogis, blocks are great tools to help keep you supported as you maintain alignment through the whole body. In this pose, it helps me to keep my hips square and back straight at the same time so I don't have to choose between one or the other. This allows me to get the most benefits from this posture.
I am using 4 inch foam yoga blocks in this tutorial. Mat, blocks and other props from @shophalfmoon
Top is from @lululemon
Use YOGAALIGNMENT15 promo code to save 15% on all Halfmoon Yoga Products and Accessories
What is the Difference Between Cobra Pose and Upward Facing Dog Pose / Bhujangasana and Urdhva Mukha Svanasana?
There are 3 main differences between Cobra Pose (Bhujangasana) and Urdhva Mukha Svanasana (Upward Facing Dog Pose). The amount of contact points, arm positioning and depth of the backbend.
Cobra Pose or Bhujangasana and Upward Facing Dog Pose or Urdhva Mukha Svanasana can look quite similar at first glance. With a greater attention to detail and a bit of explanation, you’ll be able to notice the difference next time you see them.
Let’s begin with discussing the similarities between the two:
Both Backbends
Both Prone Positions (on your belly)
Toes are pointed and tops of the feet are down on the mat
Legs and glutes are engaged
Hands are down on the mat
Chest is lifted, shoulder blades are engaged
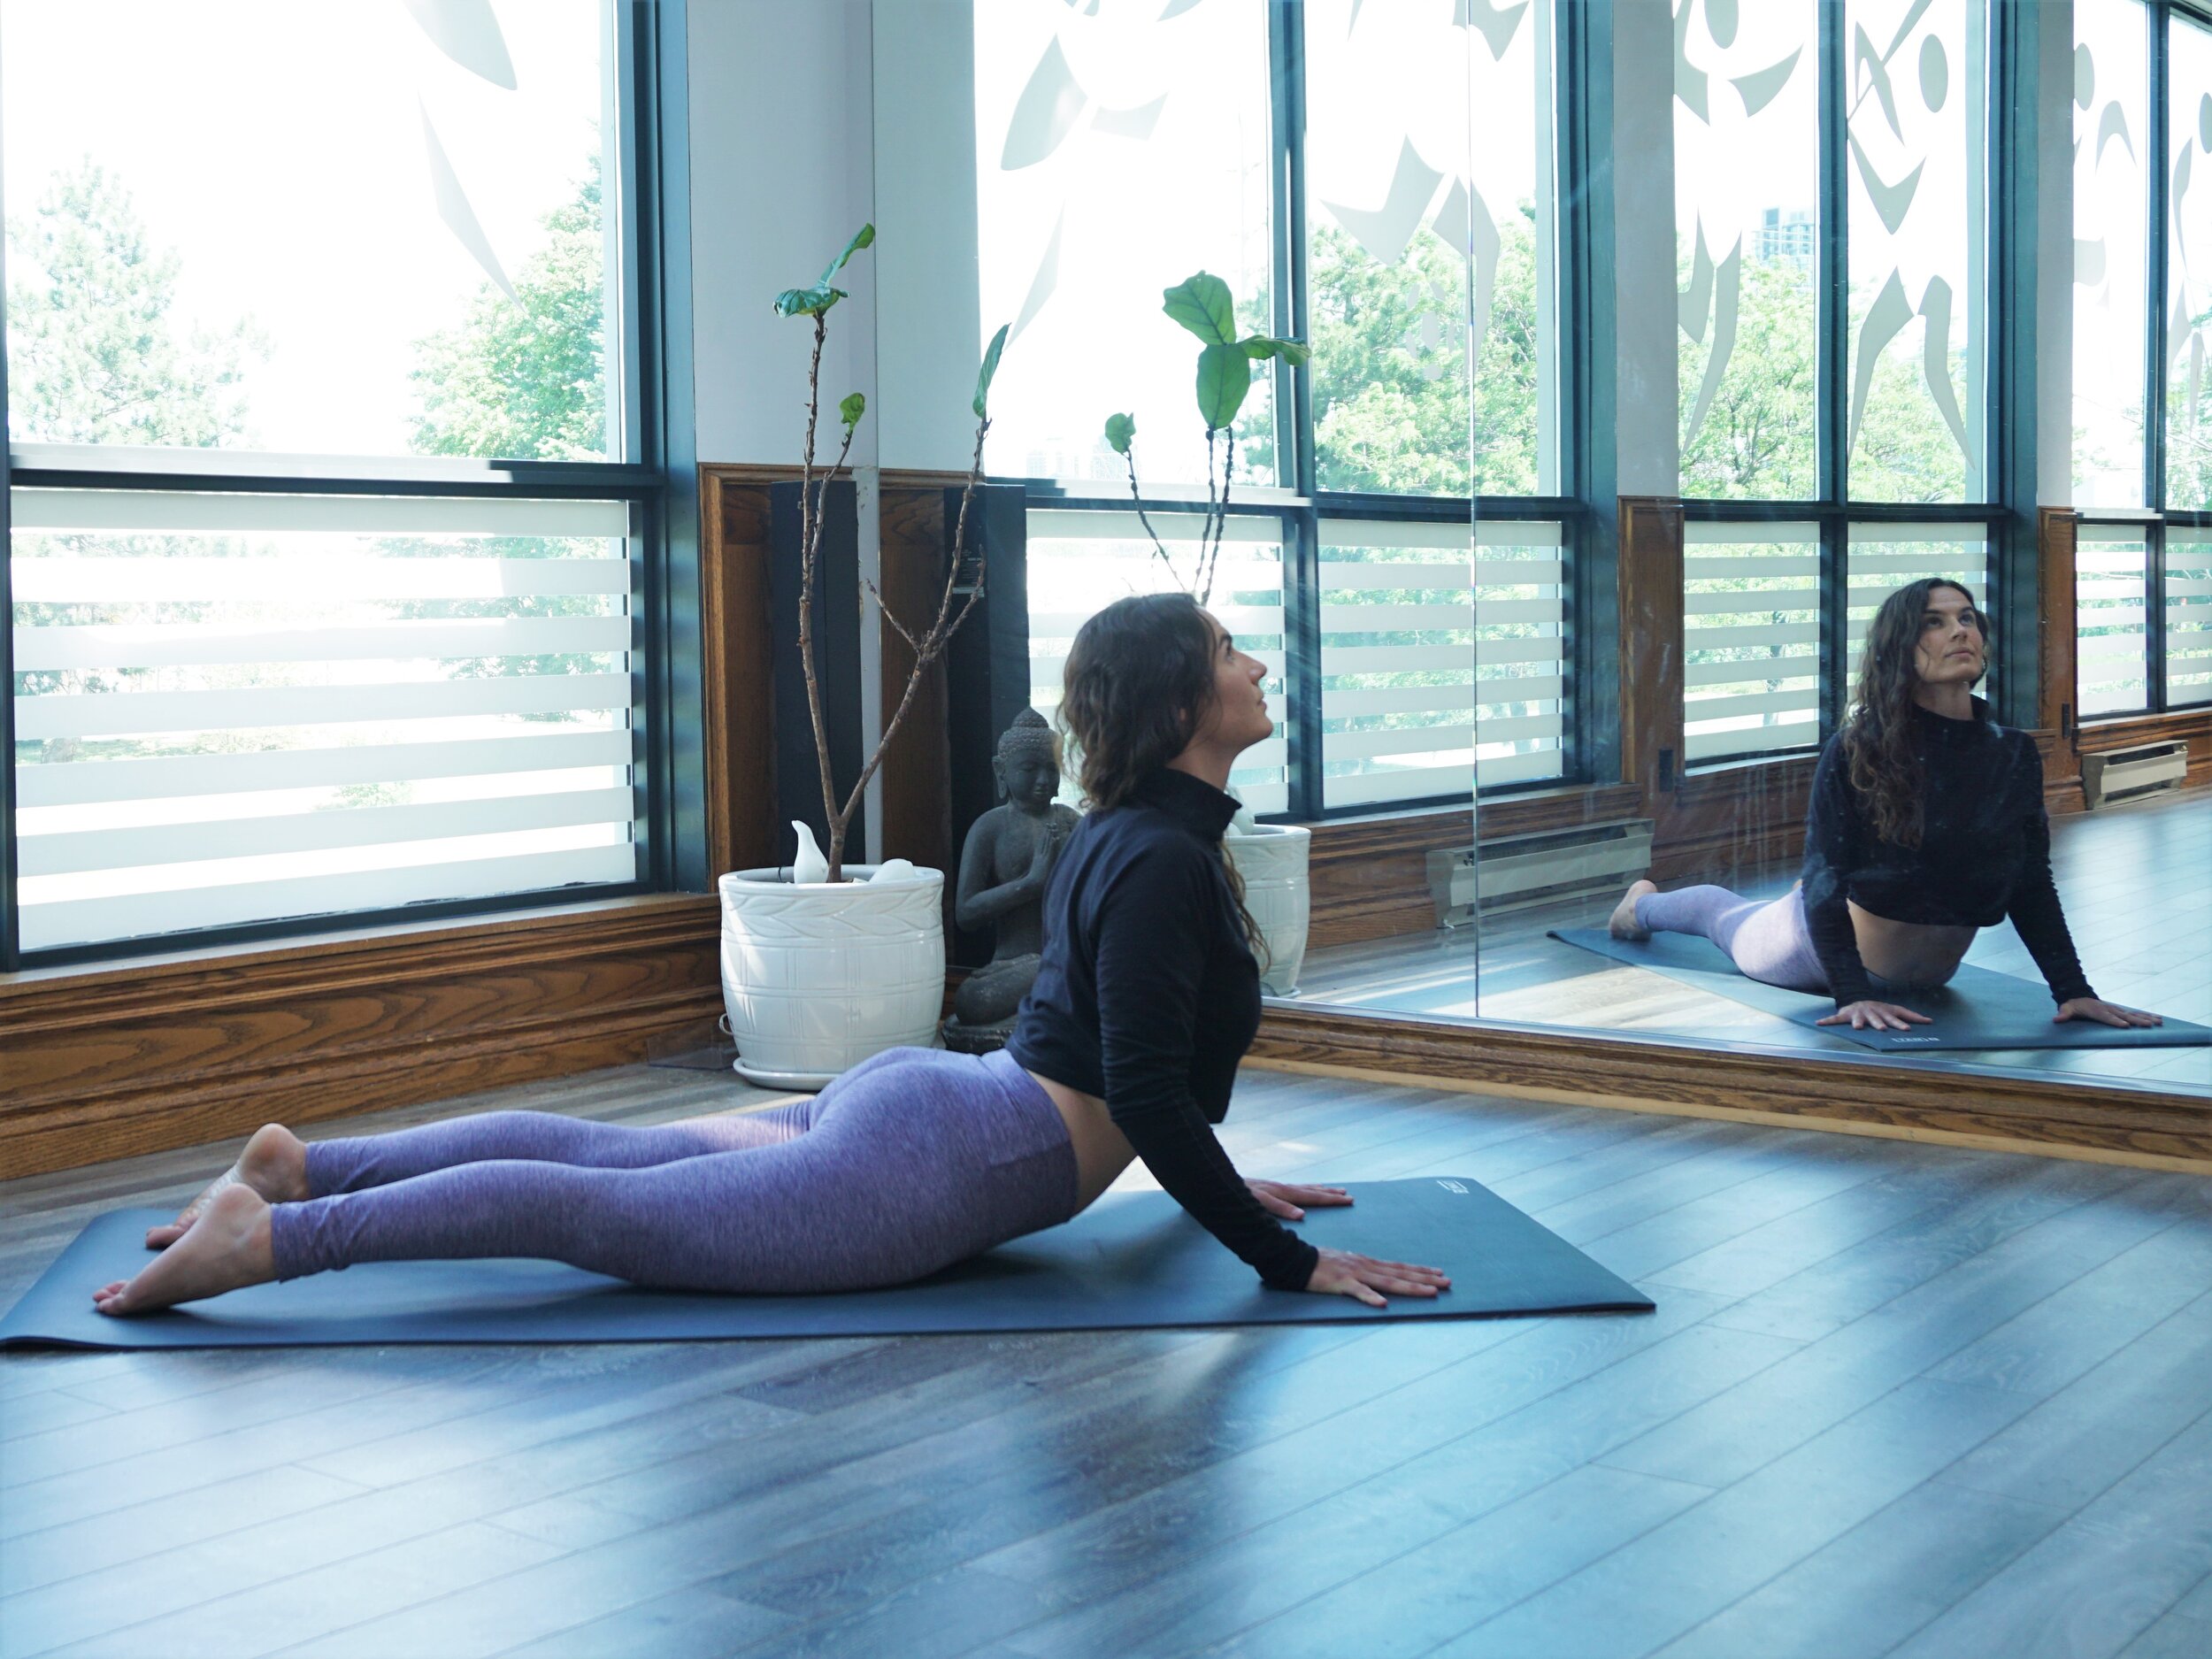
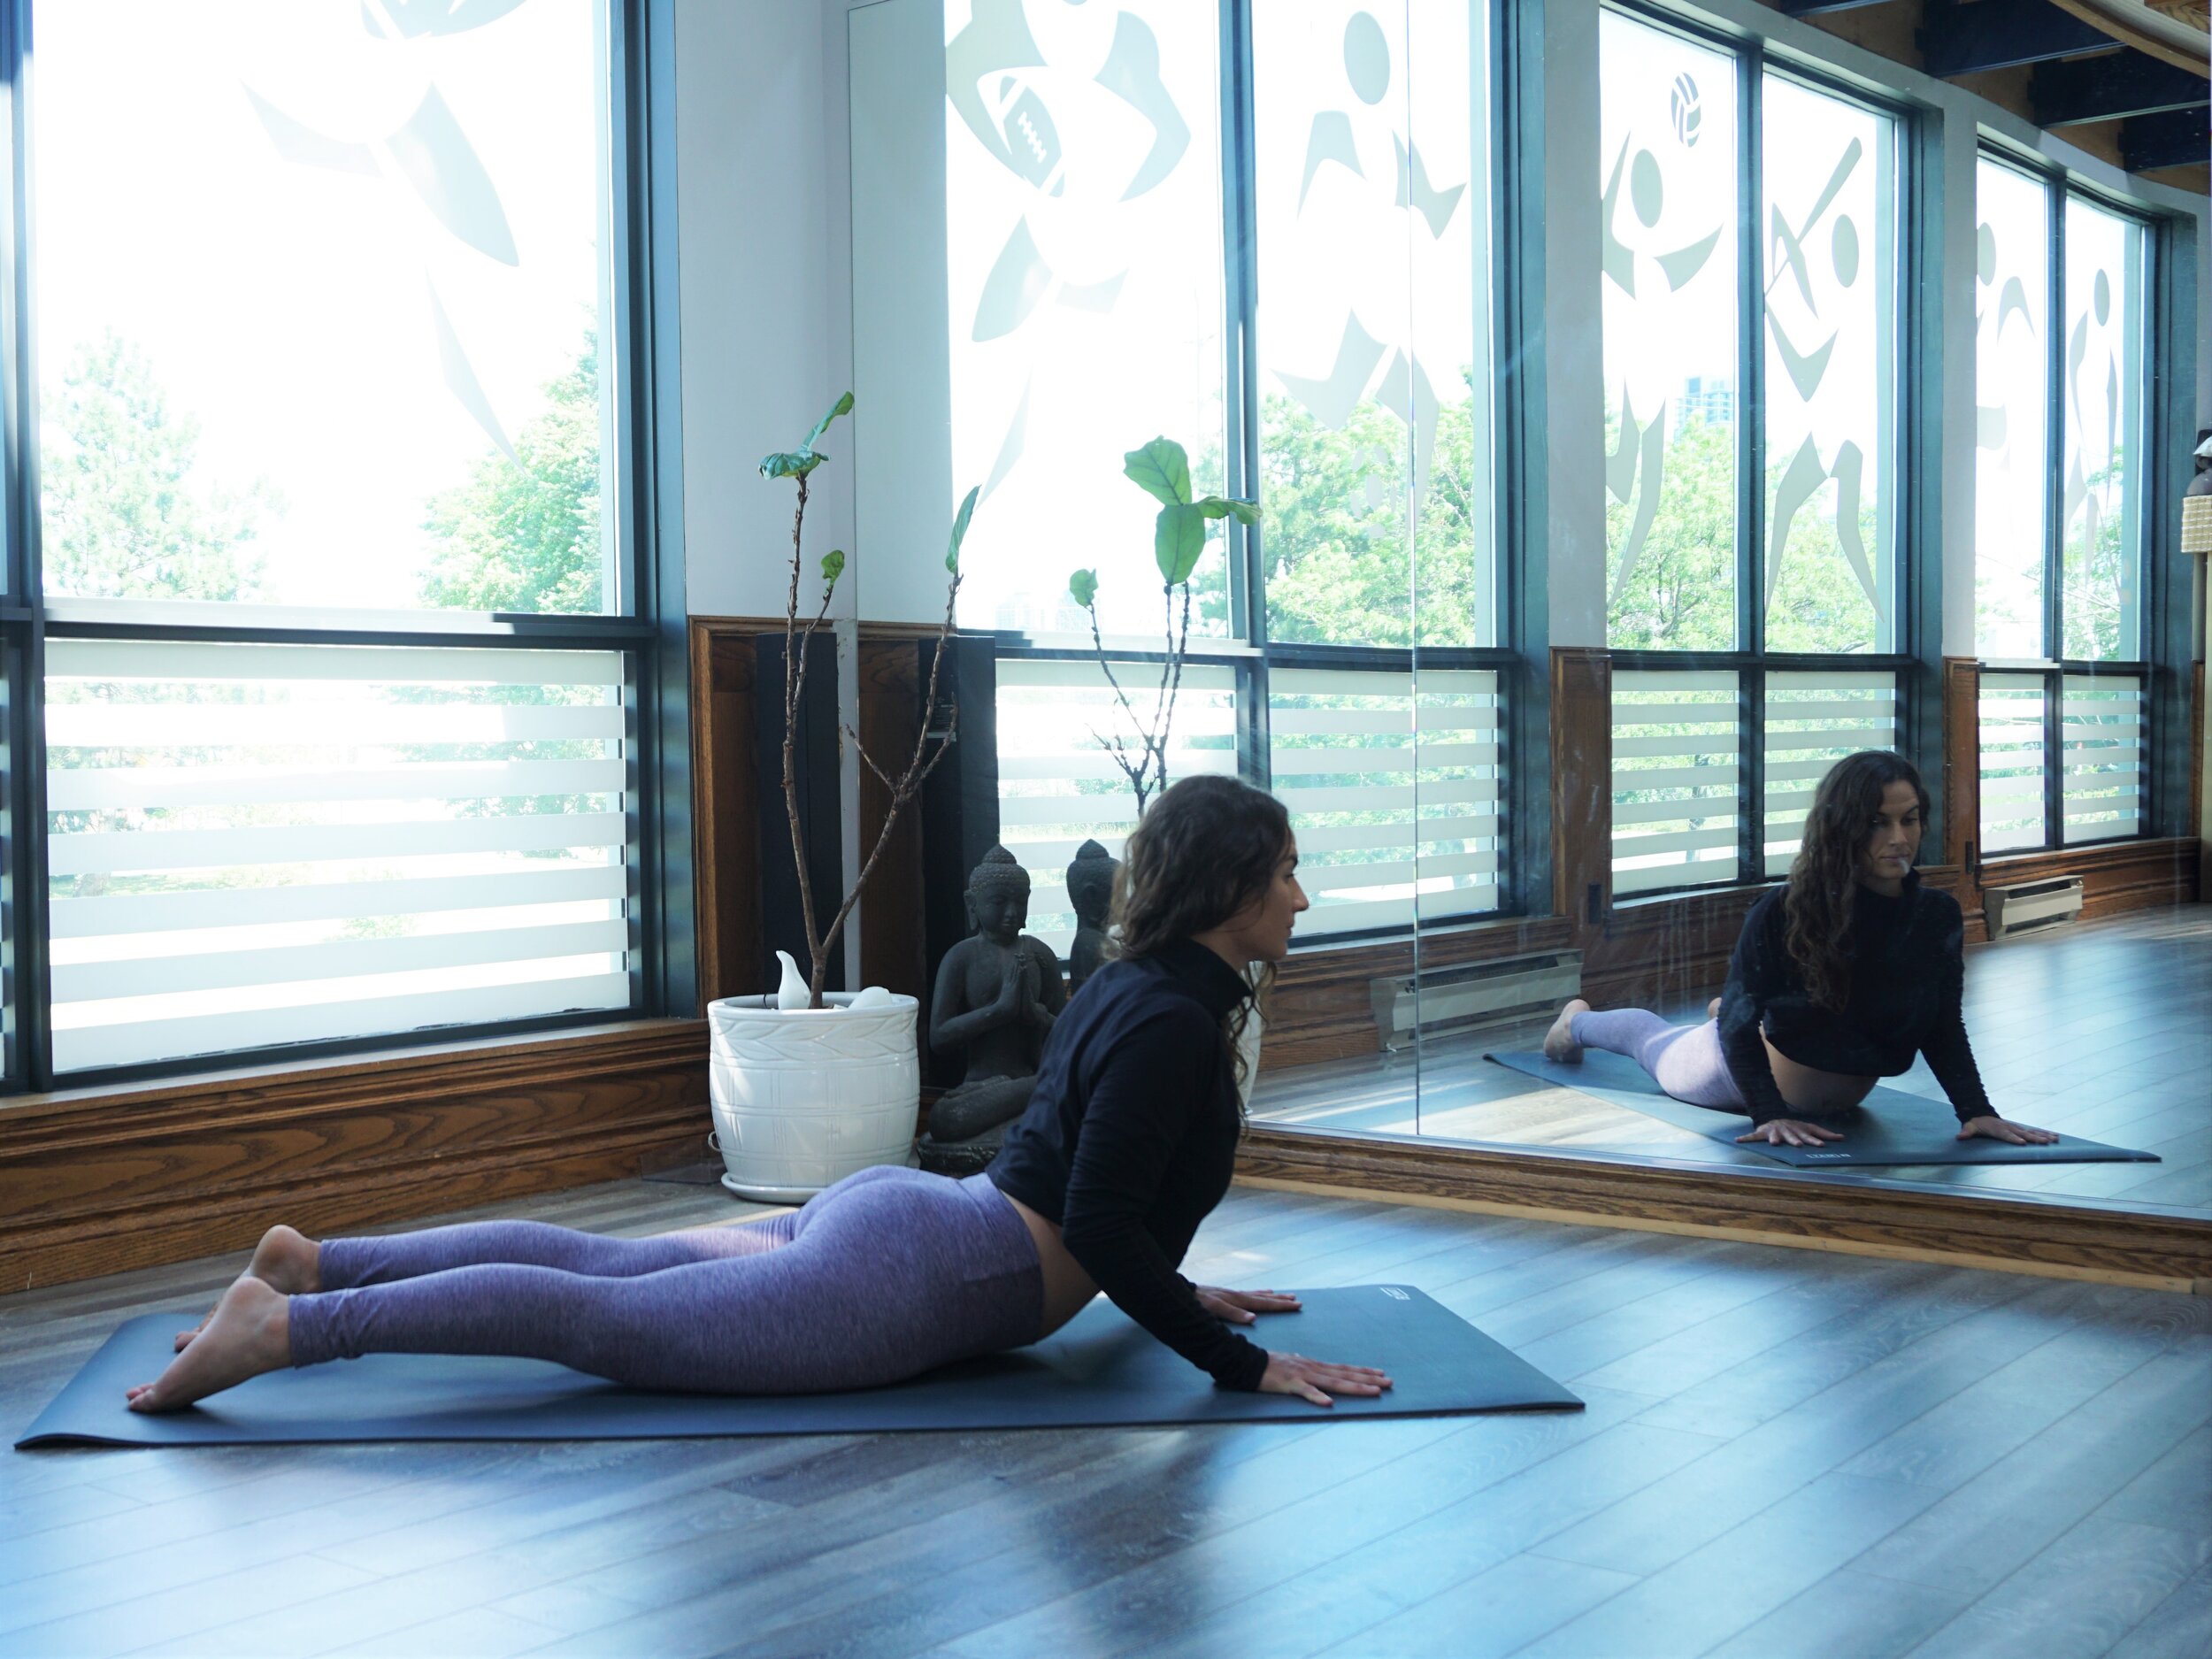
Cobra Pose / Bhujangasana
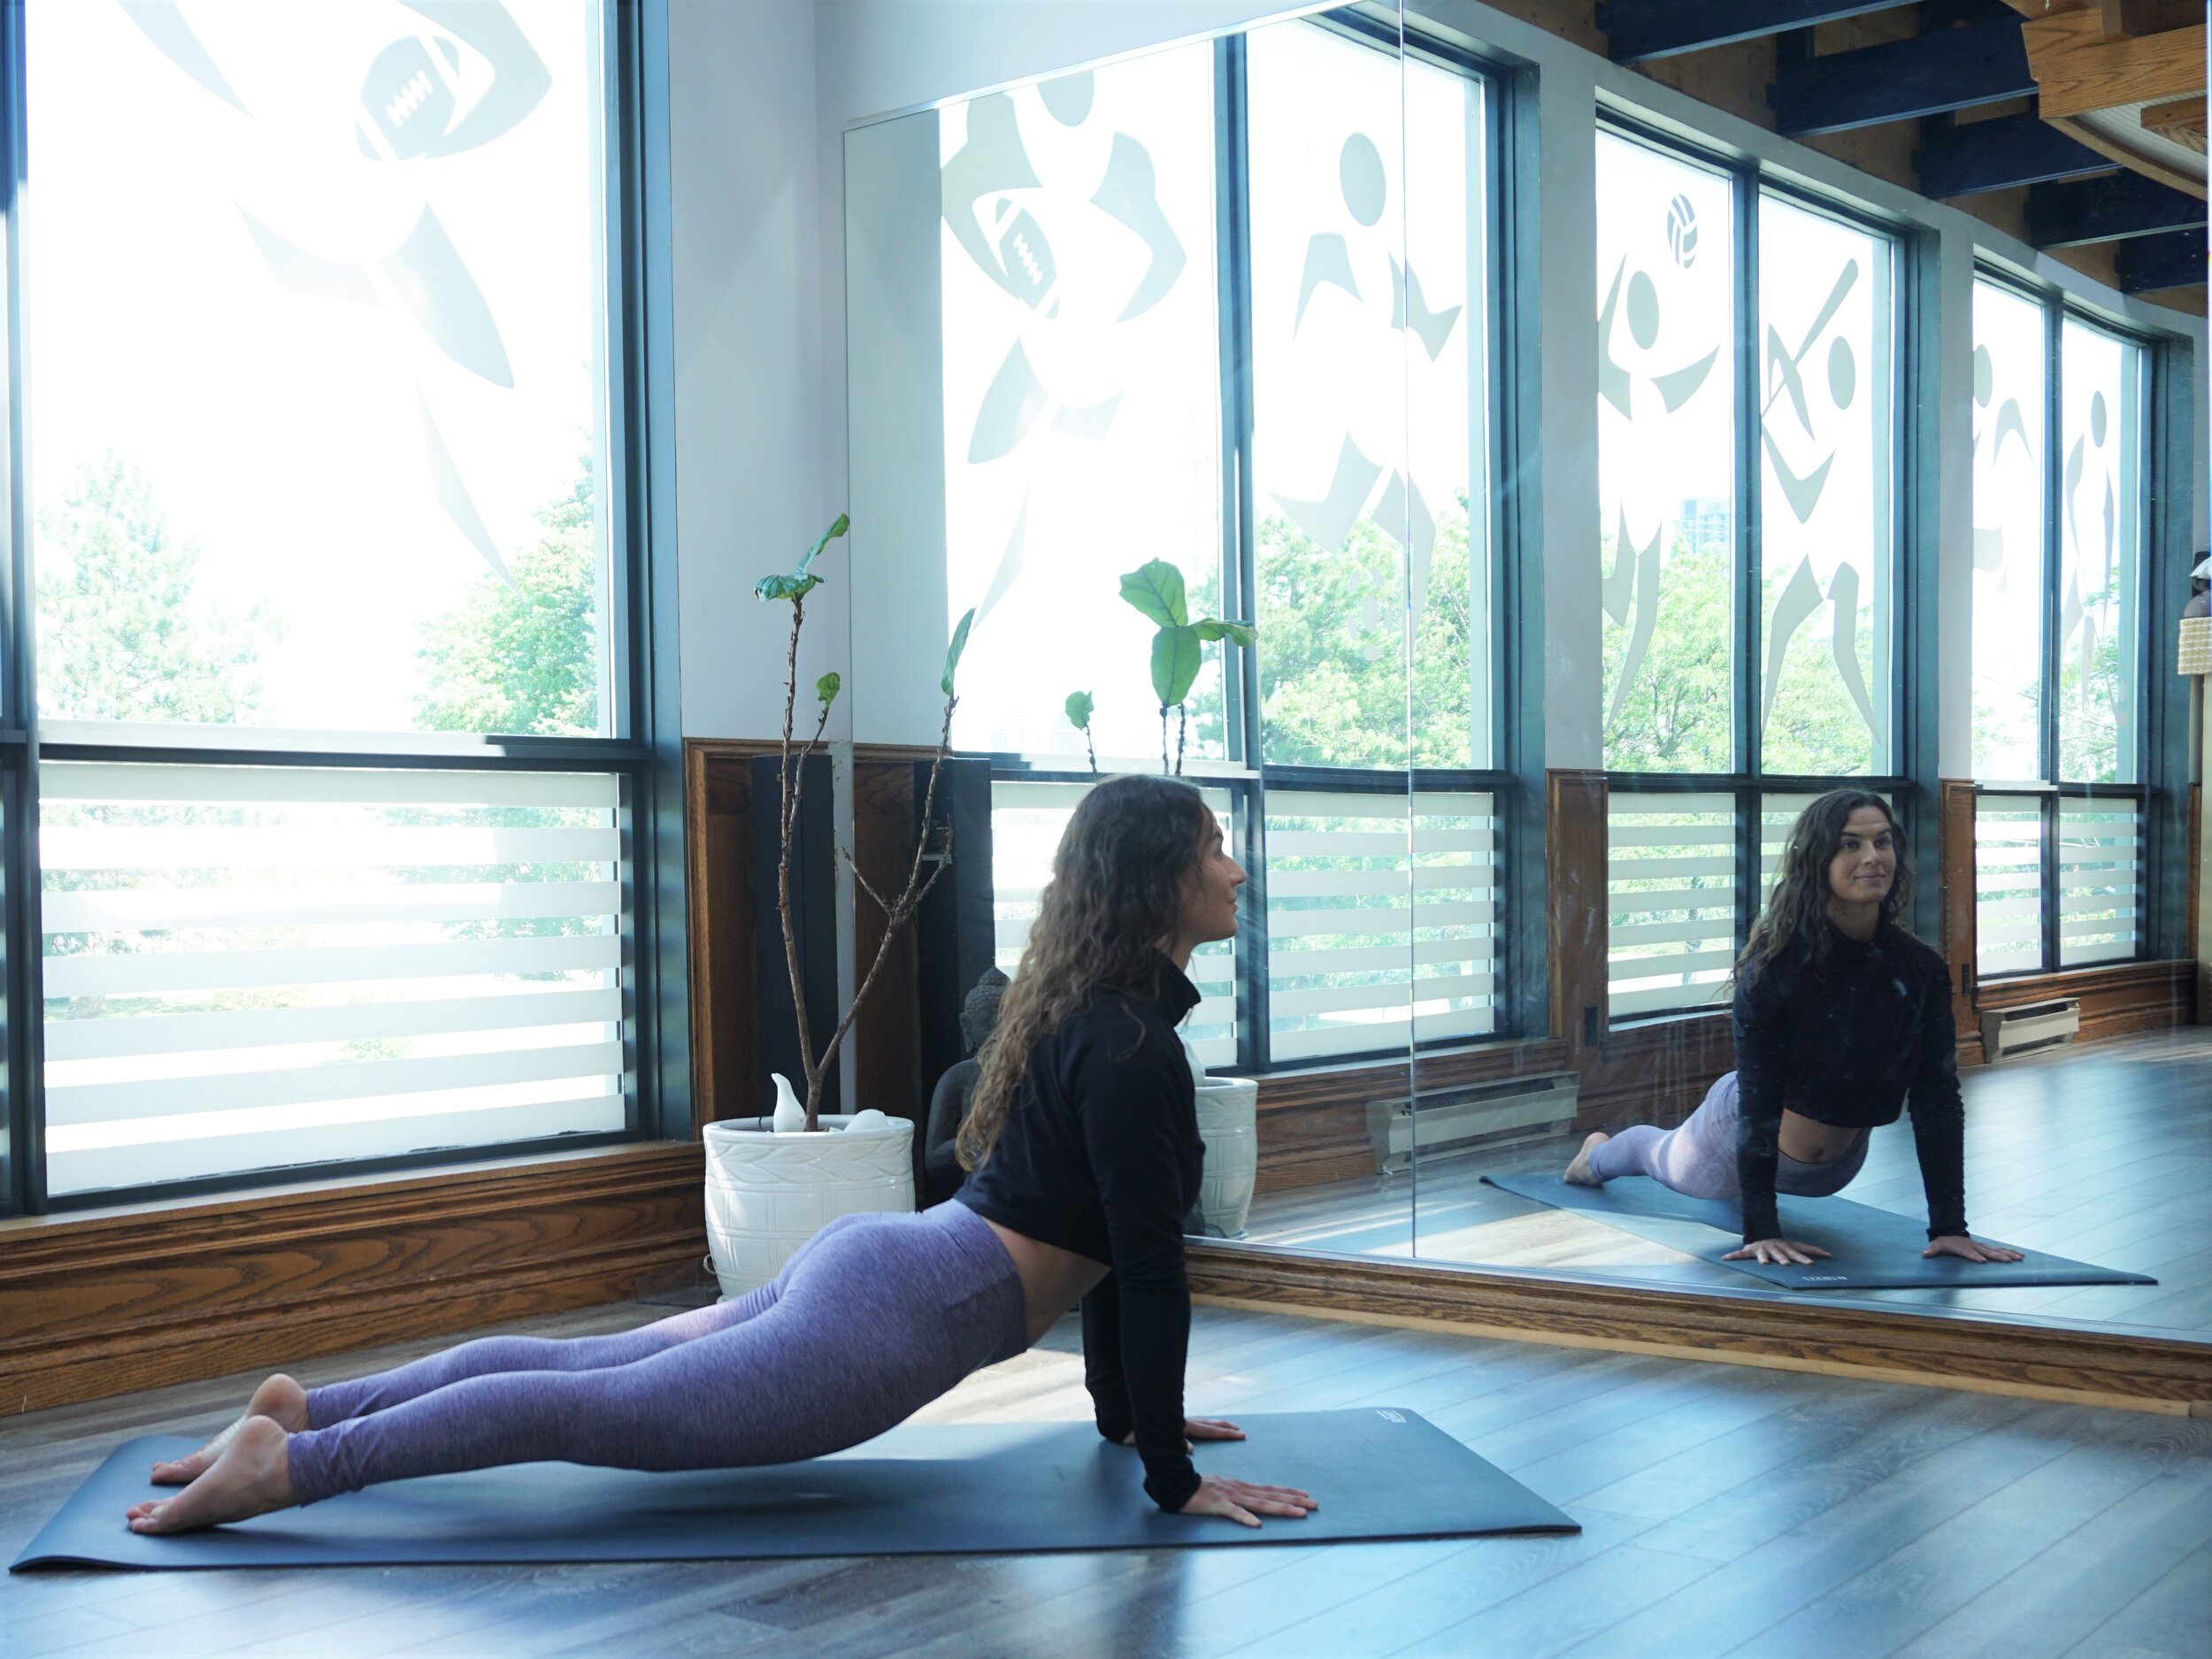
Upward Facing Dog Pose / Urdhva Mukha Svanasana
Now that you know all of the similarities between the two, let’s discuss the main differences!
CONTACT POINTS- which parts of the body have contact with the mat.
In Cobra Pose (Bhujangasana), the tops of the feet, knees, thighs, pelvis and hands all press down on the mat
In Upward Facing Dog (Urdhva Mukha Svanasana), just the tops of the feet and the hands press down to lift the knees, thighs and pelvis off the mat.
ARMS POSITIONING- where the wrists are located in relation to the shoulders.
In Cobra Pose (Bhujangasana), the hands are in front of the body, creating a diagonal line from the wrists to the shoulders. Arms are typically bent, but can be fully straight for a deeper backbend. The hands and arms help to lift the upper body off the mat and bear most of the weight, which is much less than Upward Facing Dog. Typically, you will bring the hands underneath the shoulders before lifting the upper body off the mat to line them up properly. Be sure to keep the elbows tucked in close to the body!
In Upward Facing Dog (Urdhva Mukha Svanasana), the hands are directly underneath the shoulders, creating a straight line from the wrists to the shoulders. Stacking the shoulders over the wrists helps to stabilize the body because it is bearing more weight by lifting the upper and lower body (except the feet) off the mat. Keeping a microbend in the elbows will help to engage more muscles in the shoulders and keep the elbows from hyperextending. Place the hands down on your mat at your sides so you make a 90 degree angle at the elbow before lifting up. This placement will help keep the wrists underneath the shoulders as you lift into Upward Facing Dog.
DEPTH OF BACKBEND- how much spinal extension is necessary to perform each asana.
Because Cobra Pose (Bhujangasana) requires the pelvis to stay on the mat, the main areas of the body that dictate how far the spine extends (back bends) are the hands. There are so many levels of depth in the amount of bend in this pose, that it is more easily attainable and safer for most yogis.
Baby Cobra (Ardha Bhujangasana)
Baby Cobra (Ardha Bhujangasana) is a great variation to start with. The hands do not touch the mat, they simply float just below the shoulders as you lift the chest using the muscles in lower back and shoulders. If this is too easy, you can simply press the hands down onto the mat underneath the shoulders and lift the chest up until you have found a desirable amount of bend in the back. The amount of bend in the arms is not important, but making sure they are do not splay out to the sides is! Keep those elbows tucked!
Upward Facing Dog (Urdhva Mukha Svanasana) is quite a deep backbend and it is not a posture I would recommend to those that are just starting out. Because the arms are straight, it already creates a deep bend in the back. Because you are lifting the body off the mat, the lower back has more load to deal with and the shoulders, arms, wrists and hands require more strength to hold the body up. There is no way to decrease the amount of bend in the back without using some sort of prop. To decrease the amount of bend, you’ll need to increase the amount of space between the hands and the mat. You can do this by using a chair, or putting blocks underneath the hands. This will put more weight in the feet and decrease the amount of bend and weight in the lower back!
———————-
Knowing the differences between the two postures, think about which one would be best for you to use in your practice. While performing Sun Salutations or Vinyasas, Cobra Pose (Bhujangasana) is the best alternative to Upward Facing Dog (Urdhva Mukha Svanasana. If you’re looking for a wrist-free option, Sphinx Pose or Supported Cobra Pose (Salamba Bhujangasana) is best to perform because the weight rests in the elbows and forearms, with no bend in the wrists. To perform this, lift the chest off the mat and place the elbows directly underneath the shoulders with the forearms and hands resting down on the mat pointing forward.
Remember to always be safe when performing backbends. Know your limits and move slowly and mindfully into each posture!
xx
Yoga Alignment
What is the Difference Between Crow Pose / Kakasana and Crane Pose / Bakasana
Bakasana is used as a general term for “Crow/Crane Pose”, but there is actually a difference between the two poses and they have different names!
Crow Pose and Crane Pose- don’t they both mean Bakasana?
Bakasana is an arm balancing pose often used and accepted as a general term for Crow and Crane Pose. Although these two yoga poses are seem quite similar, they are actually different. Do you know what the difference is?
The sanskrit word Bakasana translates into “Crane Pose.” When we are referring to “Crow Pose,” the appropriate sanskrit name is actually “Kakasana.”
Similarities:
These postures are both arm balances where the palms of the hands are the only points of contact on the ground. The hands press into the floor as you tuck the knees in towards the body, lean forward and lift.
Differences:
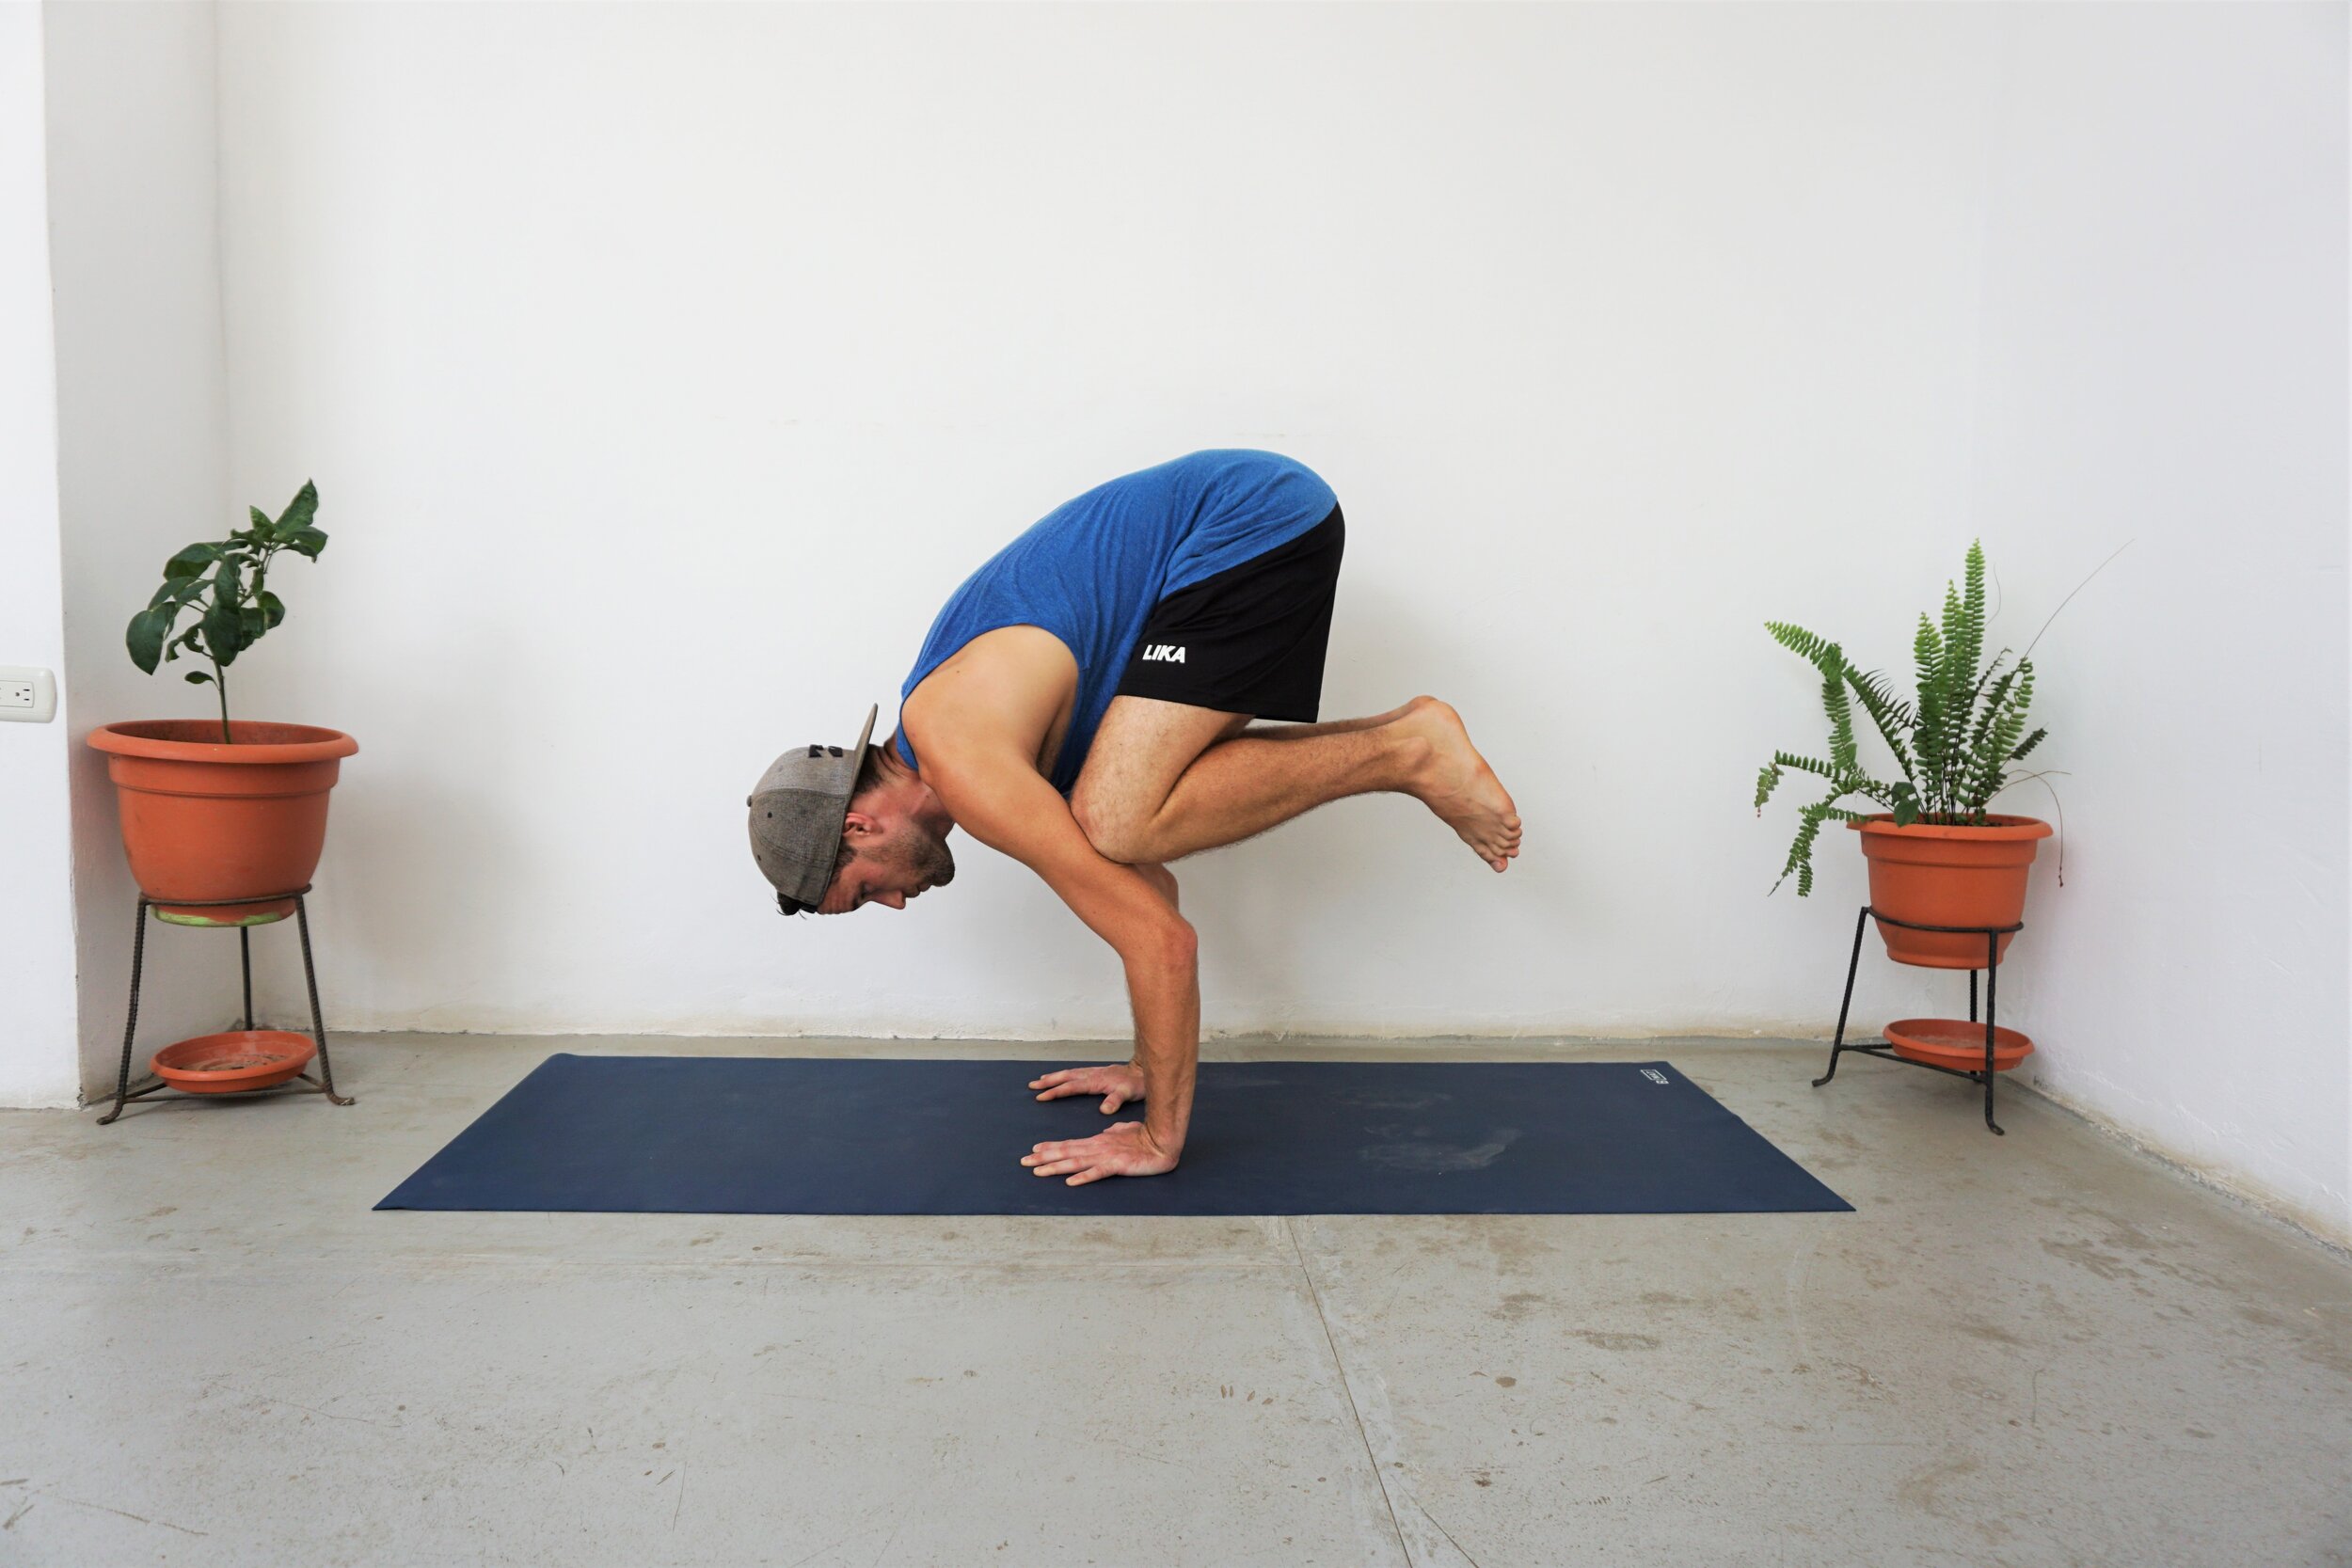
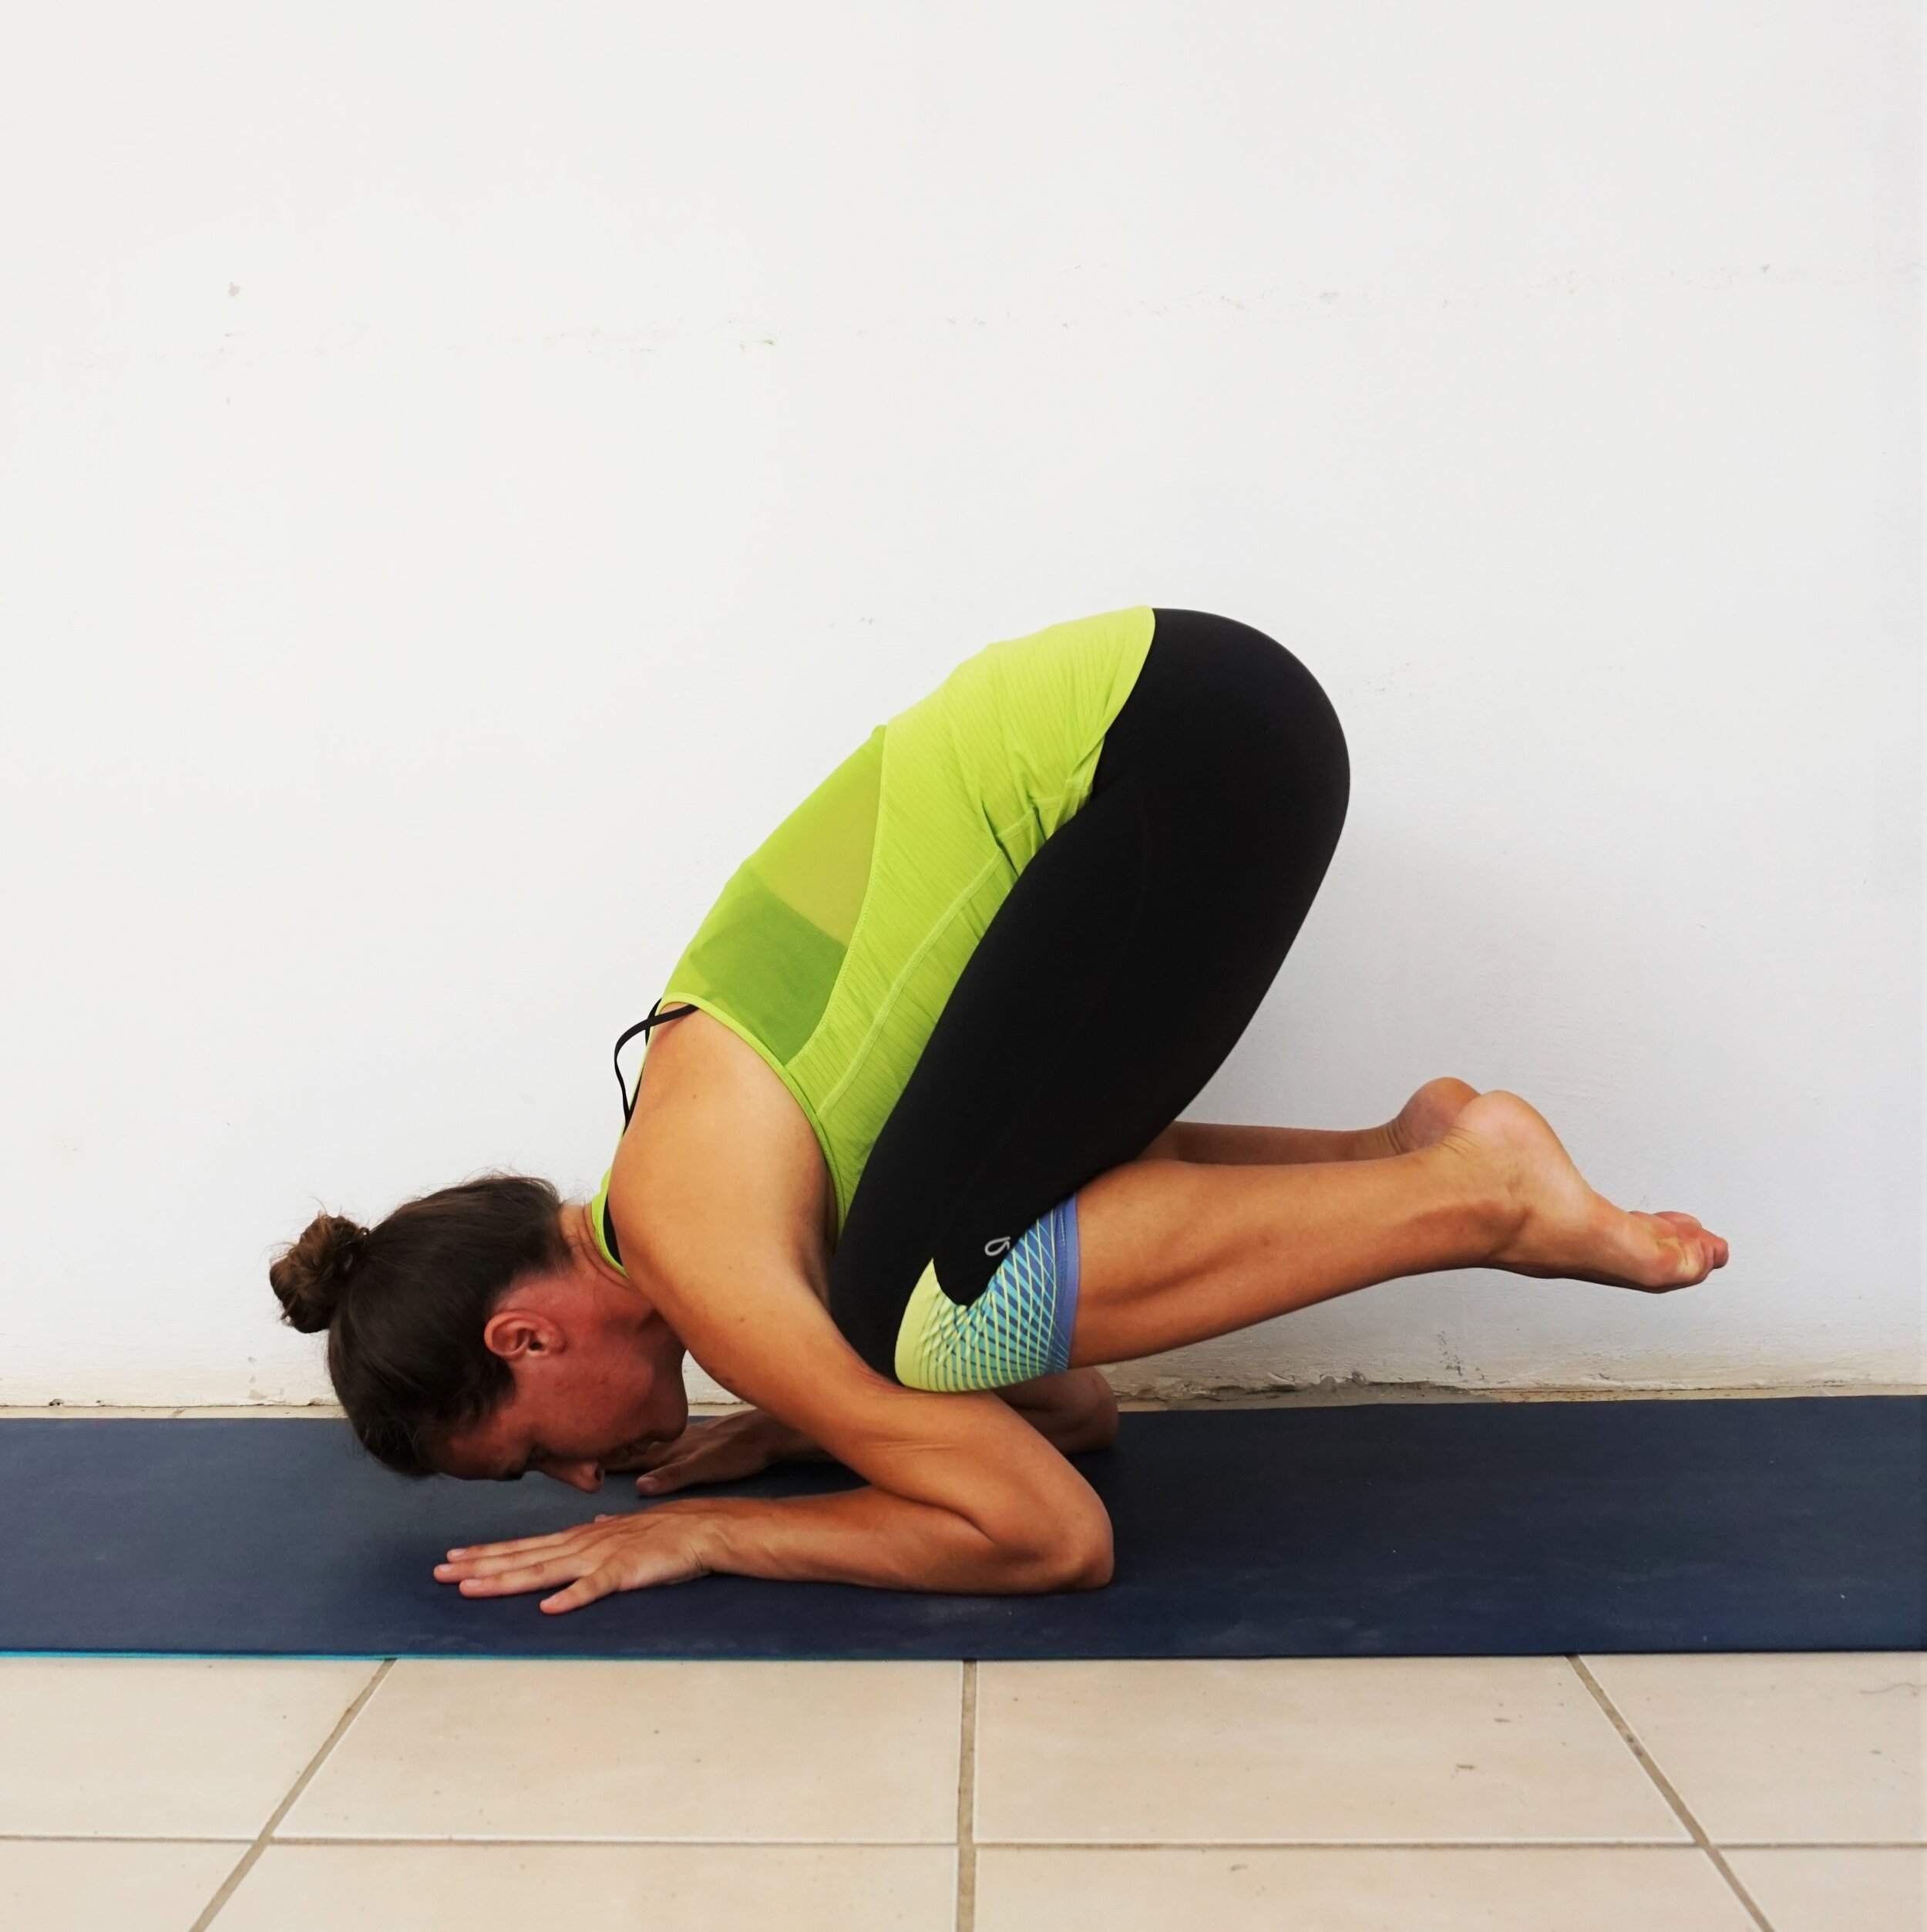
Crow Pose or Kakasana requires bent arms, with a bend at the elbows above 90 degrees. Think of a crow being lower to the ground. Crow is the easier variation of the two and is best to master first before attempting Crane.
VS
Crane Pose or Bakasana requires straight arms (or with a very slight bend in the elbow). Think of a crane that has very long legs and is higher off the ground. Crane is a more difficult variation, which can be entered from Crow Pose or in a similar starting position except with the arms kept straight.
When discussing Side Crow, it is often referred to as Parsva Bakasana, which actually refers to Side Crane Pose- a much more difficult version where the arms are straight. The correct sanskrit term for Side Crow Pose is Parsva Kakasana.
Are you struggling with either Crow Pose or Crane Pose?
Try Karandavasana or Duck Pose. This is also known as Baby Crow Pose or Baby Kakasana (and sometimes mistakenly Baby Bakasana).
Duck Pose requires both forearms and hands planted as you tuck the knees into the chest, lean forward and lift. It can be much easier for those who still need to build up arm and shoulder strength for Kakasana. This pose is easier because you are closer to the mat and there is a bigger surface area (your arms and hands) to balance on.
With whichever bird you choose, we wish you happy flying!
xx
Yoga Alignment
What are the Key Principles of Yoga Alignment?
How do we apply alignment in our yoga practice? This article really helps to break things down to understand why certain movements are necessary and how we can utilize alignment to create a stronger practice.
We’ve discussed what yoga alignment is and why it's important in previous articles. It’s time to address key alignment principles to help you understand how to can apply alignment into your yoga practice and why it’s necessary. We have made these principles flexible so that they can be followed by the majority of individuals since every body is so unique. These are only guidelines- please deviate as necessary for your body and ask questions if you are unsure.
11 Key Principles of Alignment and How to Apply Them:
1. Align with a Solid Base and Start from the Ground Up
As you position yourself into a posture, align yourself as you engage your muscles step-by-step. If your feet are on the ground, start activating and aligning each body part as you move from soles of the feet up towards arms and head. If you are practicing an inversion, begin with the hands, arms and head then work your way to the feet. Whatever type of pose you are performing, begin aligning where it makes the most sense for you and systematically move into each area of the body.
2. Be Present and Move Mindfully
Focus your attention on the each body part as you breathe and move. Moving with attention and focus can make a big difference in the way you practice. This principle will help you obtain more bodily awareness which will further deepen your yoga practice.
3. Engage the Right Areas of the Body Based on the Pose
It’s important to align the body properly so that the right muscles can activate and the right connective tissue can stretch. There are many books on anatomy that discuss exactly which muscles and connective tissue are targeted to stretch and strengthen. We touch on this briefly in each of our yoga pose alignment examples. By gaining a better understanding of this you will attain greater benefits, progress faster and be more in tune with your anatomy.
4. Keep the Neck In Line with the Spine
This is the #1 rule when performing yoga postures and is necessary in almost all asanas. The neck is a part of the spine, so having them line up is very important to optimize functions like energy flow, breathing and stability. Whether its a back bend, forward fold or inversion, keeping the neck safe is our priority. Developing this into a habit will improve your yoga practice and your life outside of yoga.
5. Stack Your Joints
Arranging your joints in line with each other will offer further support, stability and strength to you while practicing yoga. An example would be to stack the shoulders above and in line with the wrists and elbows in Plank Pose. Another example would be to keep the knee in line with the ankle in Warrior 1 Pose.
6. Mind the Micro-Bends when Needed
In an ideal aesthetic world, every line we would make with our bodies while practicing yoga would be straight. Fully straightening in certain positions, particularly involving the knees and elbows, is not always the best case scenario as there is a risk of joint hyperextension. This can be applied to the standing leg’s knee in Tree Pose and the elbows in Downward Facing Dog Pose. Use this principle to maximize muscular engagement; micro-bending is important too!
7. Change Your Angles as Necessary
Creating a 90° angle is a common cue given in many asanas that involve bending at the knees and elbows. This doesn’t mean that deviations from that angle are wrong. If an angle isn’t working for you, change it so that it feels right for your body. Increasing the angle at the bend of the elbow or knee is perfectly okay. Use this principle to experiment to find what angle is best for you.
“Using these principles will help you build a strong foundation to support the body in each posture”
8. Don’t Overdo It
When alignment instructions are given, try not to overcompensate when performing them. Examples would be over-broadening the chest and tucking the tailbone passed neutral in Mountain Pose. Use this principle to bring balance into the body while practicing.
9. Perform an Amount of Cues that Work for You
Sometimes an instructor will give too many cues for their students which could become overwhelming. If given too many cues, don’t feel pressured to perform every every one of them, instead pick and choose 3 or 4 that you feel you can perform best and work on the others at a later time. Other times, an instructor may give cues that can be contradictory to what your body is able to perform. If given contradictory cues, choose the one that is most attainable for you and your body.
10. Use Yoga Props to Your Advantage
Yoga blocks, straps, blankets, bolsters, etc. can either be used as extension (to connect body parts) or as support (to help reinforce or prop up) for the body while practicing. Use them to build a better foundation and keep you aligned while practicing.
11. Use Outside Means for Feedback
Feedback is important so that you can see how your body is actually positioned— and you may look much different than you think! It’s best to discuss your movements with a qualified yoga instructor, but there are other ways to find out if you are aligned. Getting feedback in person and through visuals will help you better understand how to ideally position your body into each posture. This blog post will help you learn and implement ways to see if you’re aligned properly.
Intention: Something to Consider
If you have the intention of stretching a certain area and this goes beyond “standard” alignment cues for that particular pose, know what you are intending to do and be mindful of your movements.
This is your practice, we are just providing guidance.
xx
Yoga Alignment
How to Check Your Yoga Pose Alignment
How you think you’re aligning your body in a yoga pose and what you actually look like can be much different. Read this article to understand different ways to check your yoga pose alignment.
How do I know if I’m aligned properly while practicing yoga? This is a question we get all the time! Here are some ways to tell if your alignment is off.
5 Ways to Check Your Alignment:
1. Work With a Qualified Yoga Instructor in Person
Find an Alignment-Focused Yoga Instructor that can help provide information about your alignment either during or after class. You may need to book a private session with them if you’re going over multiple poses. They may suggest modifications and/or the use of yoga props. Never let them force your body into a position that doesn’t feel right for the sake of alignment- this is a NONO!
2. Use a Mirror While Practicing
Standing in front of a mirror is a great way to get immediate feedback to make your own adjustments right away. If you are taking a class, consider bringing your mat to the front of the room so that your view of yourself doesn’t get obstructed. Note that it isn’t possible or ideal to check your mirror in every position (no neck movements while in Shoulderstand Pose).
3. Photos
Seeing a photo of yourself in a posture is an excellent way to examine your alignment. It’s a great way to make you more aware of yourself and what you need to correct or modify. Either get someone to take a photo for you or set up your phone/camera to take pictures while you are practicing. This can also help you track your progress as you gain more strength and flexibility.
4. Videos
Just as professional sports teams “review their tapes,” the use of videos can help you to see exactly how you are moving so that you can make adjustments the next time you practice. This way is easier to set up by yourself and you don’t need anyone to record for you. We feel that this is the best way to get feedback because seeing yourself moving through your sequence will help you pinpoint where adjustments and modifications can be made.
5. Check us out on Instagram, Facebook, or Pinterest!
With 100s of asanas and even more examples of alignment, progressions and modifications, we are your trusted source for all things yogasana related. Give us a follow and DM us a request for what you would like to be shown next!
xx
Yoga Alignment
